Problem description:
- The machine stops before the laundry is dry.
- The machine displays error code E50/E51/E52.
- The drum doesn’t tumble/turn anymore.
If this matches your situation, the PCB of your machine might be out of order.
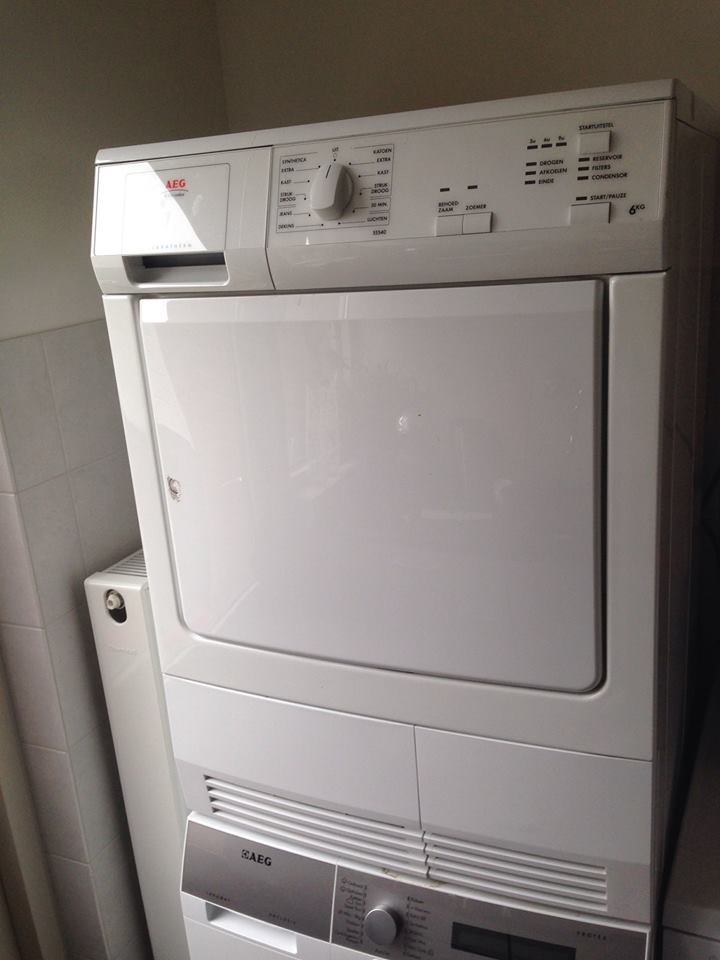
Please note, making a correct diagnosis can be difficult!
The use of a multimeter is required.
Step 1
First we need to know what the error code E50/E51/E52 means.
To check which malfunction it is exactly in your case, we must start the dryer’s diagnosis system.
- Switch off the machine.
- Press and hold the start button and the button to the left of the start button.
- Hold it down and set the selector switch to position 1 until the lights start to run. Release the buttons.
- Then turn the selector switch clockwise to position 10.
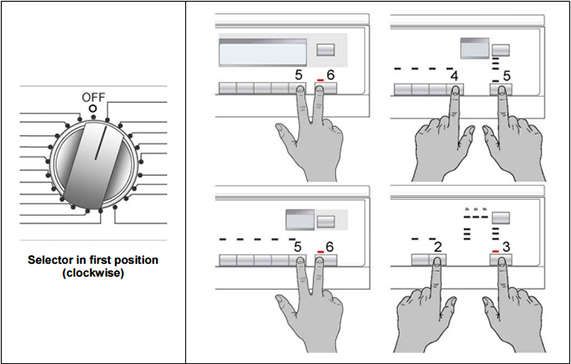
The error code appears in the display to indicate the exact problem that occurs with your machine.
With the button to the left of the start button you can scroll through the latest error messages.
No display?
If your machine does not have a display, count it each time the start button light flashes in red for the 1st digit of the error code.
Then count the number of times that the start button light flashes orange for the 2nd digit of the fault code.
For example:
Red flashes 5x and orange 2x. The fault code is then 5 – 2 = E52
Step 2
We now know which error code it is, look in the table which points you need to check.
| Error code | Meaning | Cause | What to do |
| E51 | Drum Motor Alarm | PCB does not measure the motor properly. | Check the plugs of the motor and measure the capacitor.** Measure the motor.* Both okay? Remove PCB and send it for repair. |
| E52 | Drum Motor Thermal cut- off Alarm | Engine too hot. | Check the plugs of the motor and measure the capacitor.* Measure the motor.* Both okay? Remove PCB and send it for repair. |
| E53 | Drum Engine Sensing Alarm | Triac engine control in closure. | Remove PCB and send it for repair. |
| E54 | Engine Jammed Alarm | Drum too full. Voltage too low. Capacitor broken. Engine is fixed. Drum is fixed. | Check the capacitor and remove the blockage. Both okay? Remove PCB and send it for repair. |
*How to measure the engine.
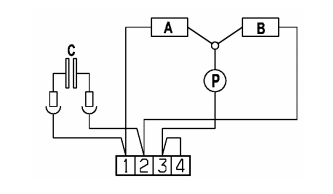
Winding A +/- 20 Ohm (contacts 1-3)
Winding B +/- 20 Ohm (contacts 2-3)
Winding A -B +/- 40 Ohm (contacts 1-2)
**how to measure the capacitor.
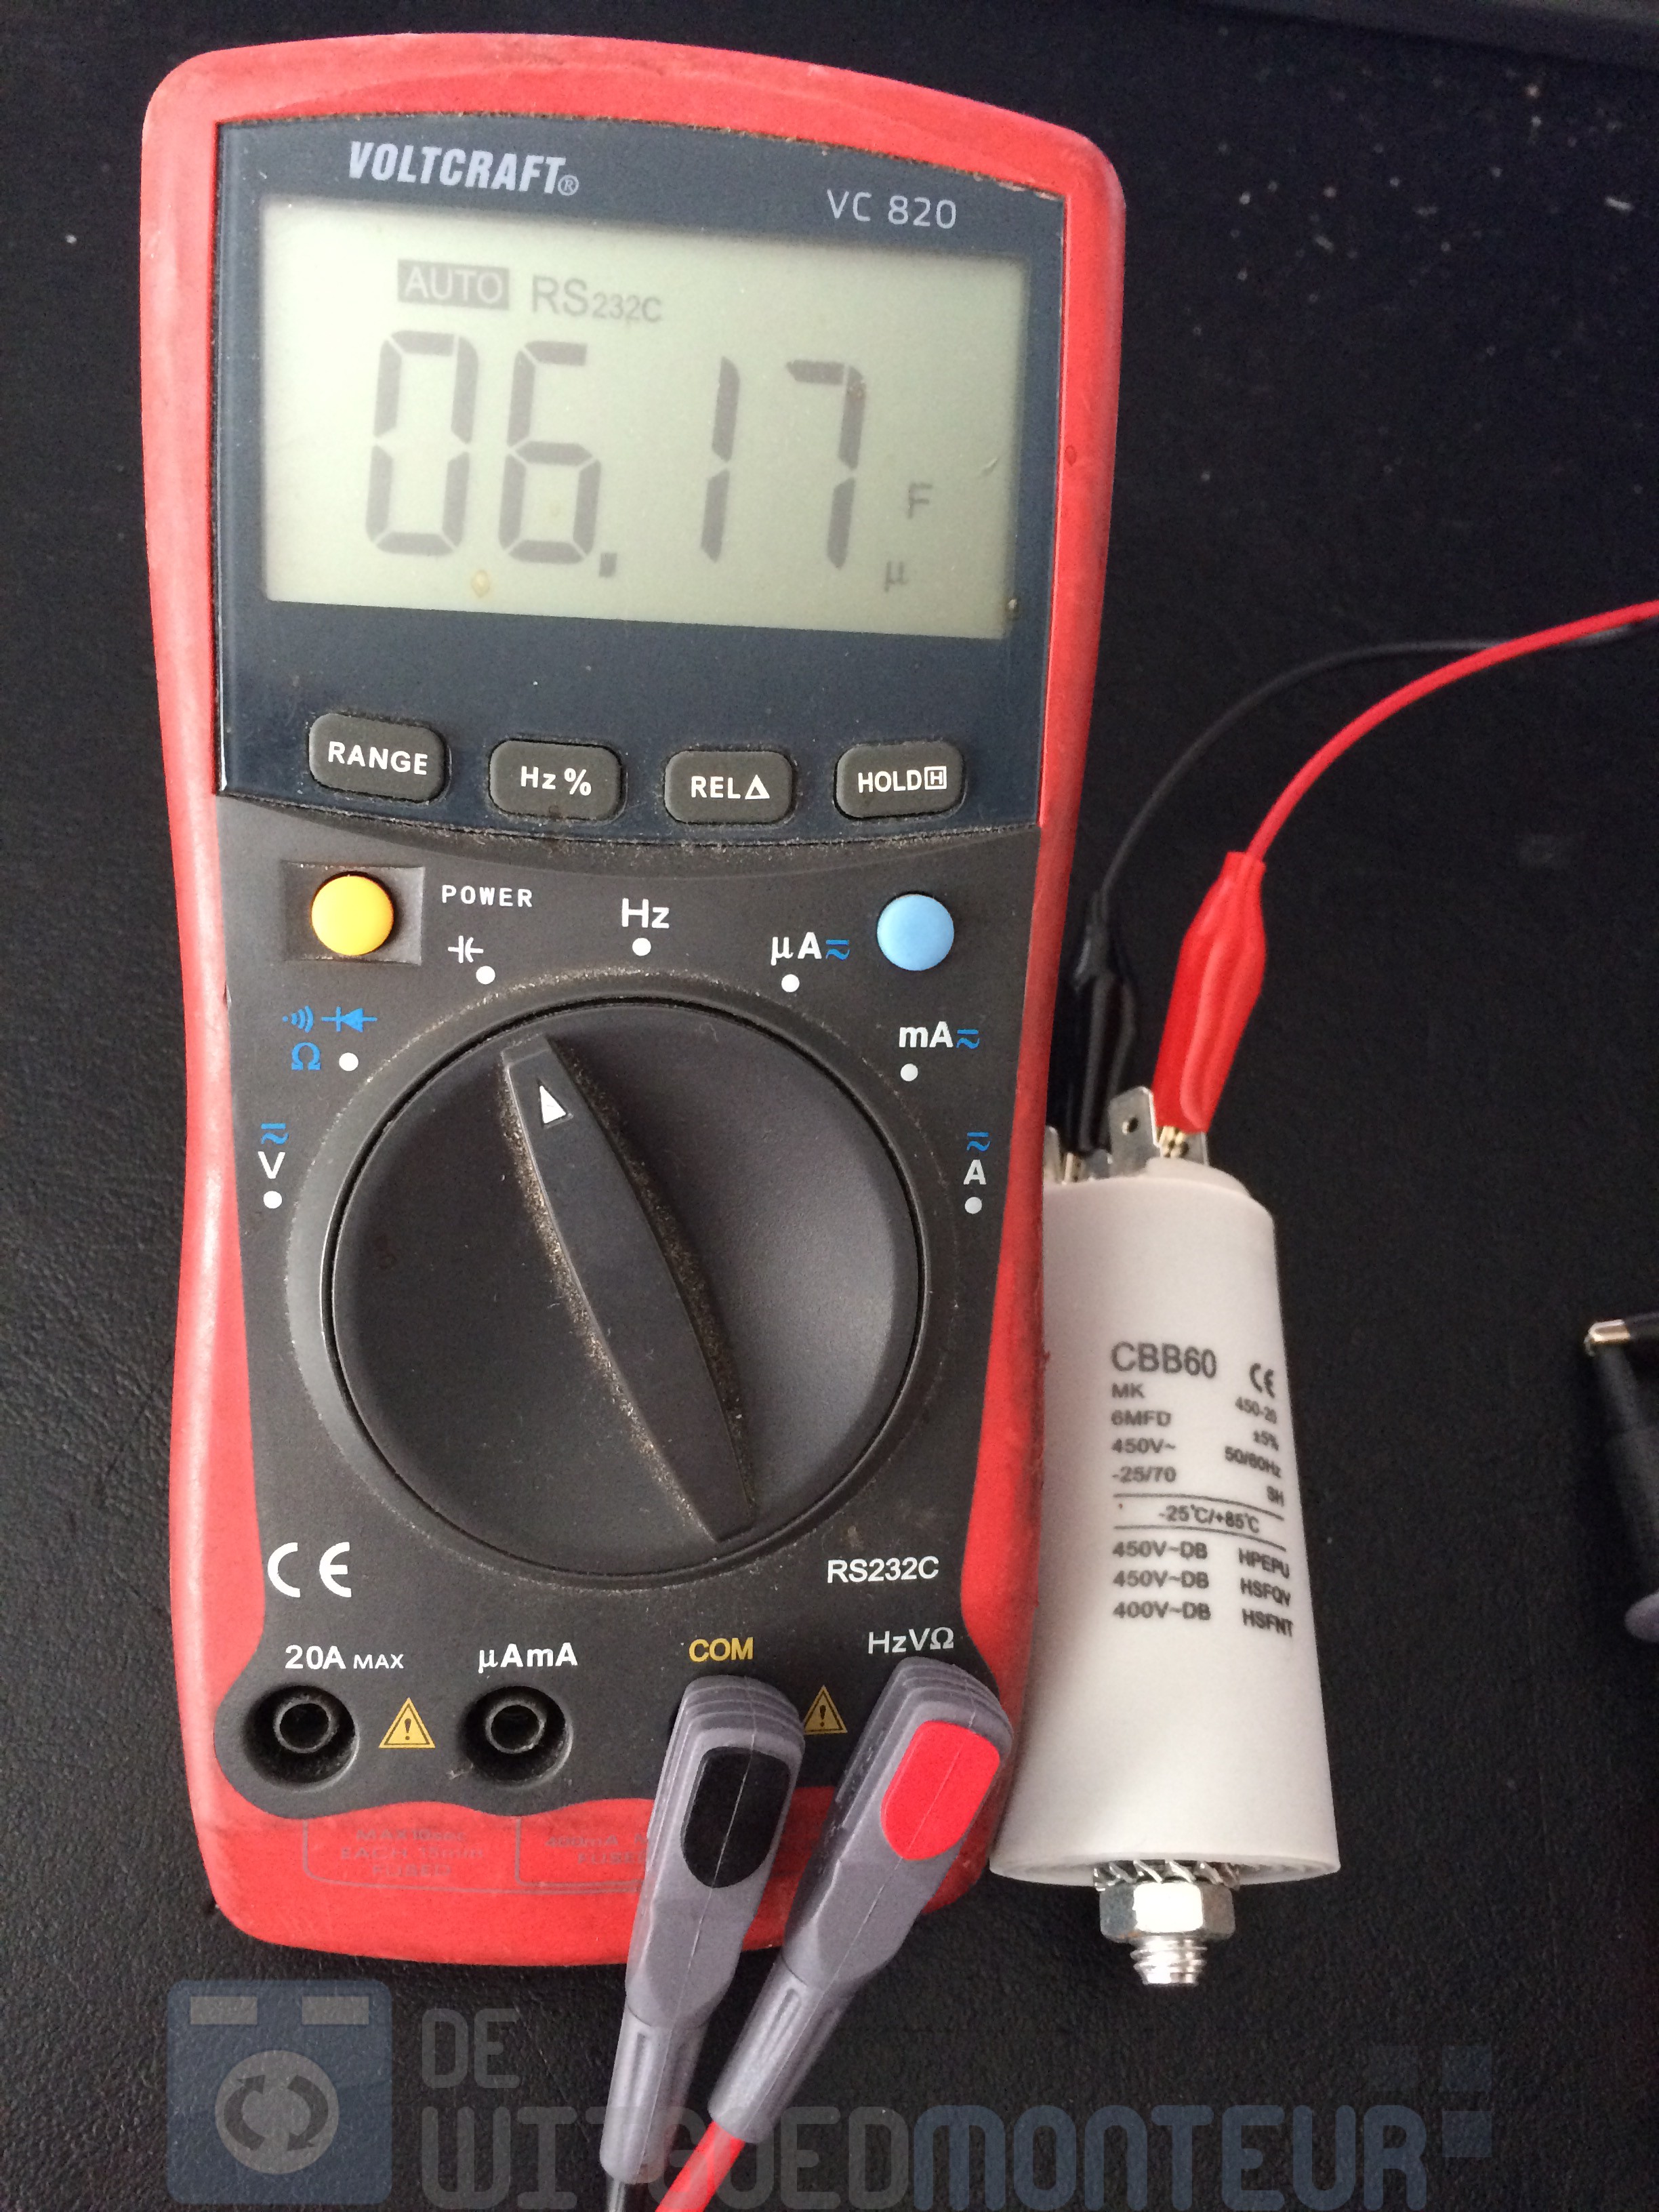
The measurement of a capacitor is possible with most multimeters. Set the meter to the correct position as shown in the photo below.
Connect the test probes to the capacitor and you can read the values from the meter.
If the capacitor is broken, the meter will read a lower reading than that on the capacitor. Replace the capacitor and test the machine again. These can be ordered in the webshop.
The values of a capacitor are expressed in Farad. In this case, the values are 6.17 micro Farad, which we write as 6.17 µF.
Step 3
We now know that the capacitor, the motor and the wiring are good so the problem must be in the circuit board. Remove the circuit board as described below.
Step 4
Double-check if the machine is realy out of order
Before you signup for repair, first double-check whether your machine realy has a defect. So no more lights or beeps when you switch the machine on – and check whether there is voltage on the outlet.
Signup for repair
If the machine still doesn’t work, then you can signup for repair.
How to dis-assemble the PCB
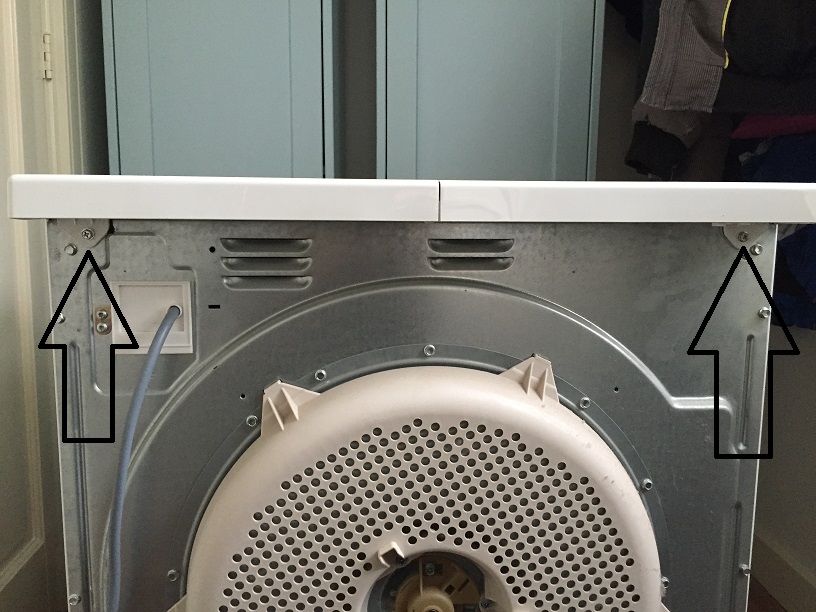
Take the water collection tank out of the machine and loosen the 3 screws that appear. Remove the top from the machine by unscrewing 2 or 3 screws on the back of the top.
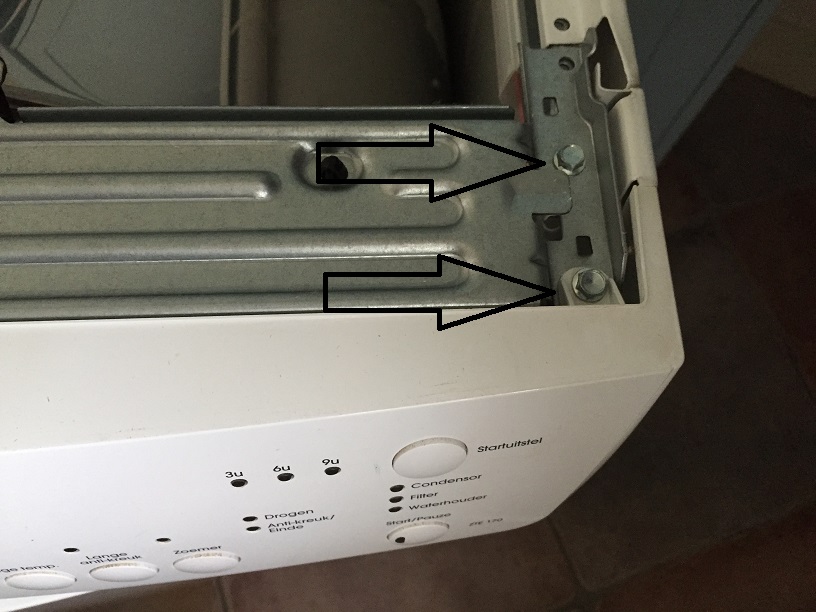
Unscrew 4 screws on the top left and right of the control panel.
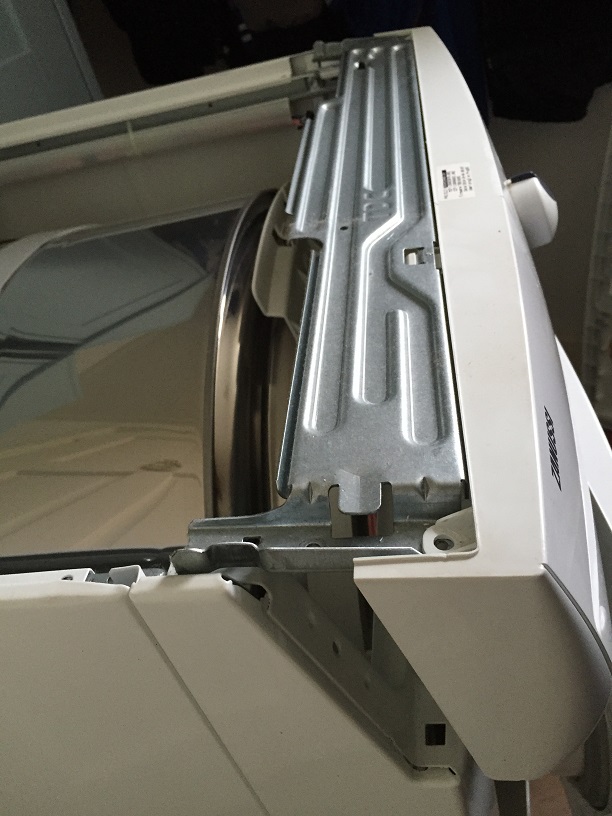
Pull the entire control panel forward and snap the metal bracket away from the plastic. Carefully disconnect all plugs, some plugs may be very stuck.
Many machines have an extra cap that you have to unscrew.
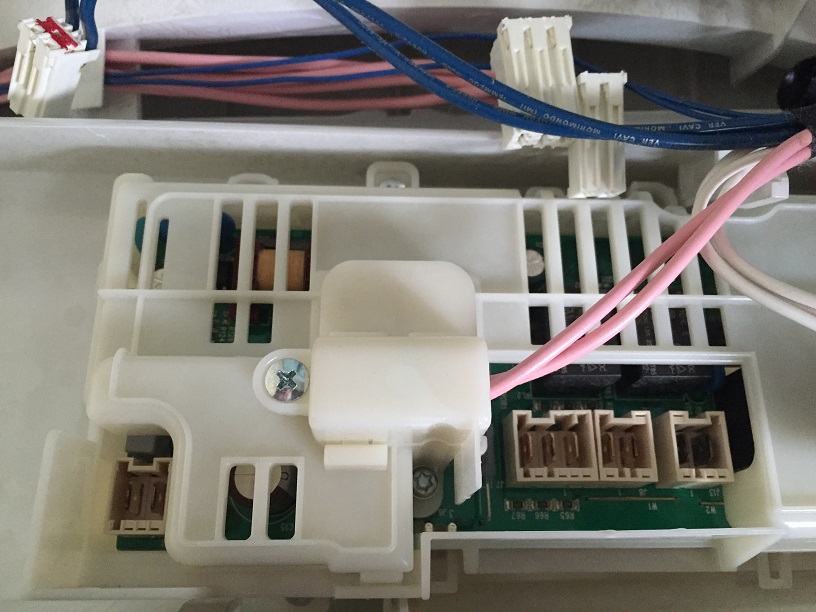
If there is a plug that does not want to be disconnected, use a flat screwdriver to disconnect the plugs.
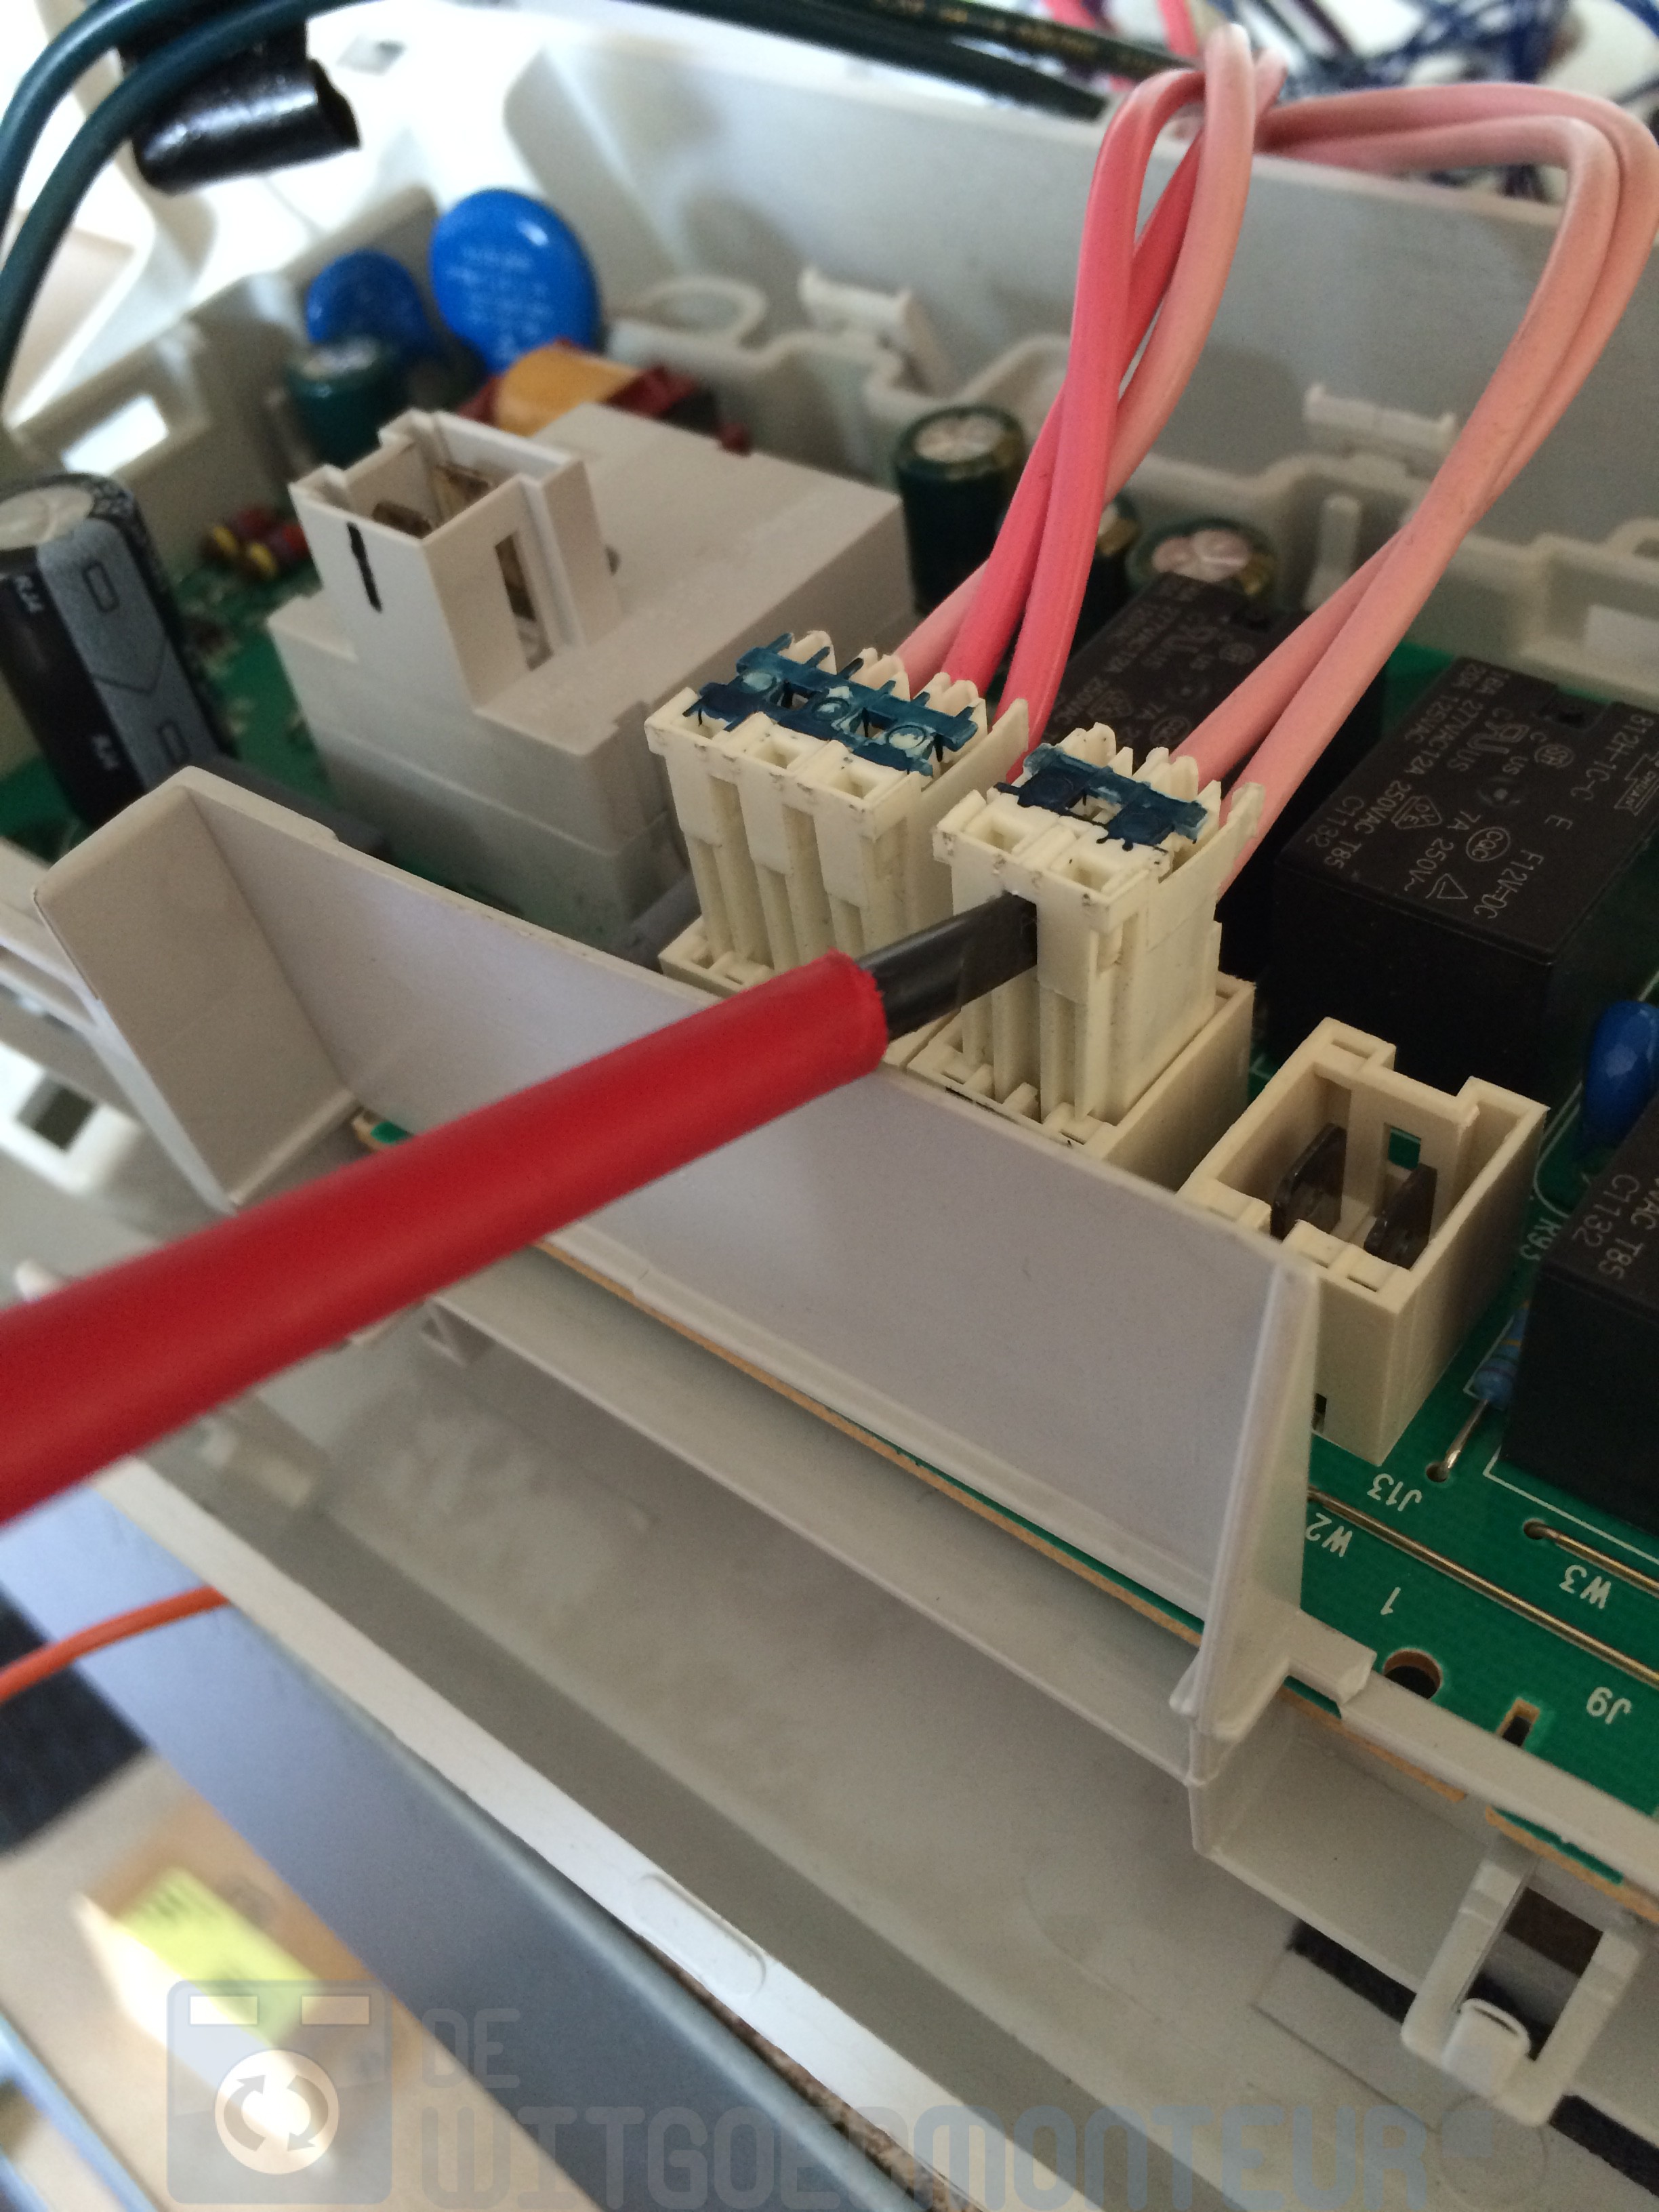
You have now completely removed the control panel.
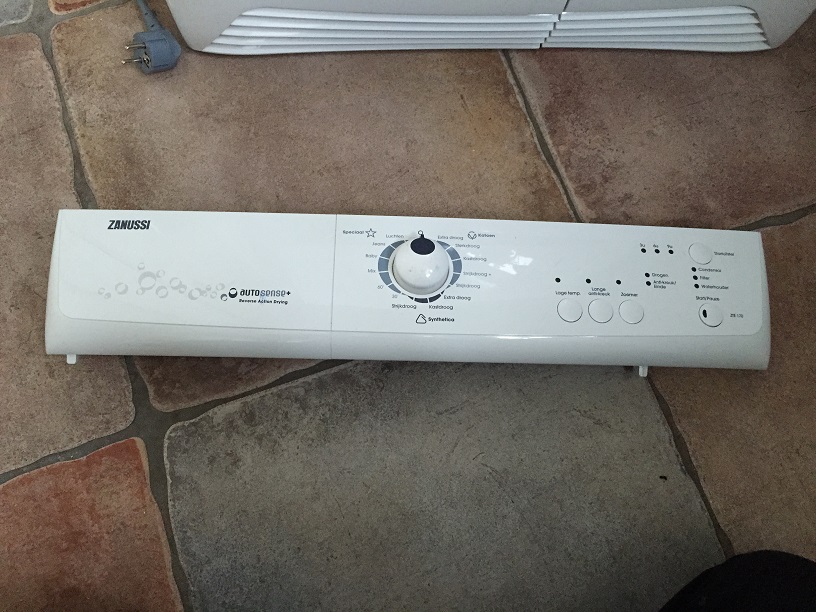
You do not need to loosen the print further, just send the entire control panel.
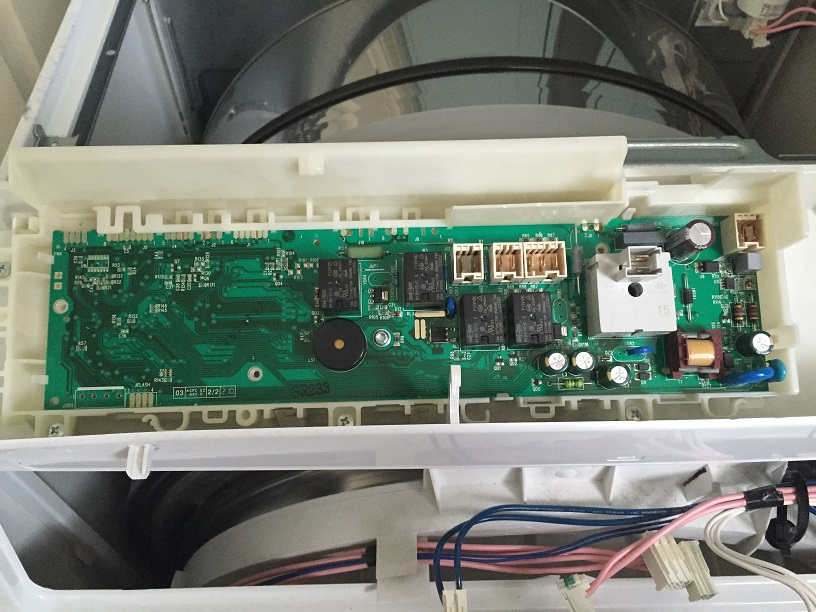
Pack the panel in a sturdy box!
We repair – among others – to the following models:
T55405
T55500
T55540
T65600
T65740
T56840L
T57630
T57800
T59840
T59880
T59860
T65189 AV
T77777
T88800
T88840
Zanussi:
ZTE220
ZTE240
ZTE260
ZTE265
ZTE270
ZTE272
ZTE273
ZTE276
ZT277
ZTE280
ZTE285
ZTB276
TC7114
TCE114
TCE224
Electrolux:
EDI96150W
EDC66130W
EDC66150W
EDC67150W
EDC67555W
EDC67550W
EDC67550W
EDH97950W


